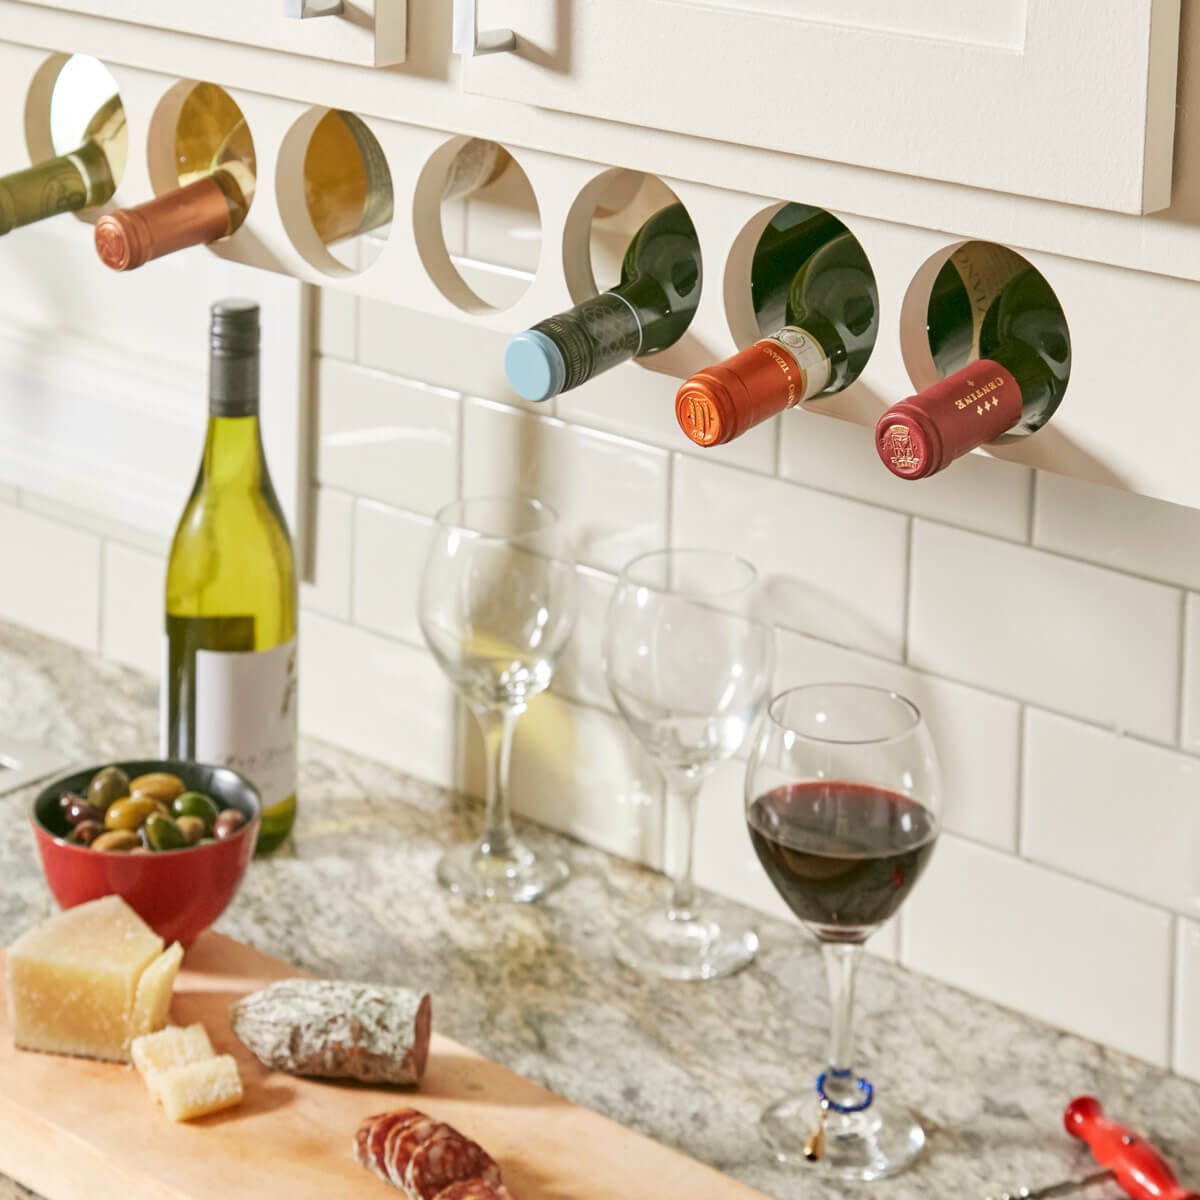
This kitchen cabinet wine rack is easy to build with just three boards!
An hour or less
Beginner
Less than $20
Introduction
There’s a lot of usable space below many upper kitchen cabinets, and it’s the perfect place to store your favorite vintages. This easy-to-build kitchen cabinet wine rack requires just two 1x4s the length of the under-cabinet bay (Photo with step 1) and a strip of 3/4-in. plywood that same length and 8 in. wide (Photo with step 8). If you have painted cabinets, poplar is a good choice for the 1x4s. Prime it and paint it to match the cabinets. If you have natural wood cabinets, select and finish the wood to match.

Modify the Wine Rack to Fit your Cabinets
You can use any of the bays under the upper cabinets you wish. The wider the bay, the more wine you can store. Our instructions will work for any size cabinet bay. Most cabinets have a 3/4-in.- deep lip surrounding each bay so the plywood will be hidden. If you have lips that are deeper than 3/4 in., shim down the plywood. If your lips are shallower, use thinner plywood.
This wine rack will hold the most common bottle diameters, but not all. If you’re a serious wine collector, measure the diameters of the bottles in your collection. Select a hole saw at least 1/8 in. larger than the largest bottle. If you need to drill holes larger than 3-1/8 in., substitute 1x6s for the 1x4s.
Hole Saw Smarts
- Running a 3-1/8-in. hole saw will tax all but the most powerful drills. If you have a drill press, use it instead of drilling by hand.
- For handheld hole-saw work, use a corded drill instead of a battery-powered one if you have one.
- Feel the motor housing as you drill. If it starts getting hot, let it cool down before continuing. Excess heat will destroy the motor whether the drill is corded or battery-powered.
- Space the board up from the workbench on 2-by scraps to eliminate tear-out and anchor it with two clamps or the board will spin free (Photo 5).
- After you score each hole about 1/4 in. deep, drill a 1/2- to 3/4-in. clearance hole adjoining each score (Photo 4). This will provide a place for sawdust to exit, which will keep the hole saw cooler and speed up drilling.
- Take your time and let the hole saw cool off after about 15 seconds of cutting or you’ll scorch the wood.
Tools & Materials for an Under Cabinet Wine Rack
Everything you need to build this wine rack is available at any home center.
- 1x4s: Choose straight, knot-free boards.
- 3/4-in. plywood: You’ll find 2×4 partial sheets at the home center, enough to do a few wine racks. Any type of plywood will work.
- 3-1/8-in. hole saw: The hole saw itself will run you about $15. If you already have other hole saws, buy the same brand so your mandrel will work in the new one. Otherwise, you’ll need to spend another $15 for a mandrel/pilot bit to operate it.
- If you don’t have spade bits, pick up a 3/4-in. bit for drilling the clearance holes.
- A small box of 1-5/8-in. No. 8 screws will take care of all fastening needs.
- 1-1/2-in. drum sander: For less than $10, you can get a drum sander kit that comes with several sandpaper sleeves of different grits.
Have a small kitchen? Learn more space saving tips and tricks here.
Kitchen Cabinet Wine Rack Project Plans

Tools Required
- 1-1/2-in. drum sander
- 3-1/8-in. hole saw
- any type of saw
- Clamps
- Drill
Project step-by-step (8)
Measure the Cabinet Bay

Measure the bay opening on the underside of the cabinet. Subtract 1/8 in. and cut two 1x4s to that length. Also cut an 8-in.-wide piece of 3/4-in. plywood to the same length.
Locate the Holes

Mark a line 1-5/8 in. from the top edge of each board. Place the boards next to each other and mark the center of each hole. The centers should be at least 3-3/4 in. apart.
Start the Bottle Holes

Clamp the wood over a 2×6 scrap or wider to protect your work surface from the hole saw. Then score each hole with the hole saw about 1/4 in. deep.
Caution:Drill with the slow speed and use the auxiliary handle if you have one (Photo above). Don’t force the cut, and never use the trigger lock. Hole saws can catch and cause bodily harm.
Drill Clearance Holes

Using a spade bit, drill 1/2- to 3/4-in. clearance holes adjoining each hole-saw kerf.
Complete the Holes

Finish cutting the wine bottle holes. Rock the drill slightly as you cut. That enlarges the kerf, reducing friction on the hole saw and speeding up cutting.
Hammer tip: Tap or pry out plugs after each hole (photo above).
Sand Before Finishing

Smooth the holes with a drum sander and ease the edges around the holes by hand-sanding with 100-grit paper. Finish the boards before screwing them to the plywood.
Assemble the Rack

Drill pilot holes and fasten both boards to the plywood backer with 1-5/8-in. screws. And be sure to place the screws between the holes.
Install the Rack

Clamp the rack to the cabinet and prop up the back with a support board. Drive 1-5/8-in. screws through the cabinet bottom into the 1x4s. Position the screws between the holes so the screw tips won’t show.


